Keurig K-Express Coffee Maker Use and Care

About Keurig
With over 125 owned, licensed, and partner brands in its portfolio and strong distribution capabilities, Keurig Dr. Pepper is a top beverage company in North America. Its mission is to deliver a beverage for every occasion, anytime, anywhere.
Our drinks enhance every moment in a world full of endless possibilities.
To make the most of every event, from before sunrise to after twilight, drink well. Do Good to benefit our people, communities, and the environment. Our company’s purpose is its lifeblood; it fuels our enthusiasm and permeates every aspect of our work.
We provide more than 125 famous brands in a broad variety of beverage categories, such as soft drinks, coffee, water, tea, mixers, and everything in between. Our brands range from still to sparkling, hot, and cold. Our drinks are here to fulfill every need, whether it’s a drink that brings comfort, awakens your senses, treats you, hydrates your body, uplifts your spirits, or delivers deliciousness without any guilt.
Our goal is to always be the thing you reach for—dawn, noon, and night, now and tomorrow. You can always find our beverages wherever you purchase, be it online, at your neighborhood convenience store, or in quantity at supermarkets, mass, or club stores. This allows you to enjoy them anytime, anywhere—at home, at work, or on the road.
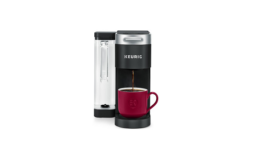
DESCRIPTION

- Handle
- K-Cup® Pod Holder Assembly
- Drip Tray Plate
- Drip Tray
- Drip Tray Base
- Water Reservoir Lid
- Water Reservoir
For replacement parts, please visit www.Keurig.com
Before You Brew

- Plug & Place
Remove the packing tape from the brewer. Plug into an outlet. Place a large mug (10oz minimum) on the drip tray.
- Rinse & Fill
Remove the water reservoir lid, then lift the reservoir straight up to remove it. If you have a Keurig® Water Filter, install it now. Refer to your Water Filter Starter Kit for instructions. Rinse the reservoir with fresh water and fill it to the MAX FILL line. Replace the water reservoir, making sure the tank is seated properly in the base. Replace lid.
- Lift & Lower
Lift and lower the handle. Do not insert a K-Cup® pod. The brewer will power on automatically.
- Cleansing Brew
The 3-cup sizes will blink. Press the 8oz button to start a cleansing brew. Pour the hot water into the sink. Do not remove the water reservoir or lift the handle once the brew button has been pressed until the brew has been completed. The one-time setup process is now complete and you are ready to brew!
- Place Mug & Pod
Place a mug on the drip tray. If using a travel mug, remove the drip tray and place the mug on the drip tray base. Lift the handle and place a K-Cup® pod in the K-Cup® pod holder. Lower the handle completely to close the lid.
- Brew & Enjoy!
The 3 brew sizes will blink. Select and press your brew size. The light will remain illuminated while brewing. Brewing is complete when the sizes are all illuminated. Lift the handle and recycle the K-Cup® pod. (See instructions below.)
CAUTION: While brewing, there is extremely hot water in the K-Cup® pod holder. To avoid injury, do not lift the handle during the brewing process.
Brewer Features
- FAST & FRESH-BREWED: Coffee made in minutes.
- BACK-TO-BACK BREWING: Immediately brew a second cup, no need to wait for reheating.
- TRAVEL MUG FRIENDLY: Accommodates travel mugs up to 7” tall.
- SIMPLE BUTTON CONTROLS: Just insert any K-Cup® pod and use the button controls to brew a delicious cup.
- MAINTENANCE ALERT: Reminds you to descale after every 250 brews
COMPATIBLE WITH THE MY K-CUP® UNIVERSAL
- REUSABLE COFFEE FILTER: Brew your ground coffee (sold separately). Auto Off automatically turns your brewer off 5 minutes after the last brew for energy savings but will be ready to brew as soon as it is powered on again.
- STRONG BREW for a bolder, more intense cup.
- DESCALE MODE: Once in mode, follow the guided process to effectively remove scale from your brewer.
High Altitude To ensure your coffee maker works properly at higher altitudes (5,000 feet) please enable the High Altitude Brewing Mode on your coffee maker.
- Begin with the brewer plugged in and powered off.
- Press and hold the POWER button and 10oz button for 3 seconds. The 12oz button will illuminate to confirm that the High Altitude Brewing Mode has been enabled.
- High Altitude Mode will remain enabled until steps 1-2 are repeated the 12oz light turns off and the 8oz light turns on to confirm that the High Altitude Brewing mode is disabled.
Caring For Your Brewer
Regular cleaning keeps your brewer running smoothly. Always be sure to turn off and unplug your brewer before cleaning.

- Brewer Exterior
Keep your Keurig® brewer looking its best by cleaning the exterior from time to time. Just clean with a damp, soapy, lint-free, non-abrasive cloth. Never immerse the brewer in water or other liquids.
- Water Reservoir
The water reservoir should be cleaned periodically by wiping the inside of the reservoir and the underside of the lid with a damp, non-abrasive, lint-free cloth. Do not dry the inside of the water reservoir with a cloth as lint may remain. Allow the reservoir to dry completely. Hand wash only.
- Drip Tray
The drip tray overflow should be emptied and cleaned occasionally. To remove, lift off the brewer base, keeping it level to avoid spilling. Rinse and clean with a damp, soapy, lint-free, non-abrasive cloth. Hand wash only.
Regular Maintenance
For great-tasting coffee, keep your brewer running at peak performance by following the recommended maintenance schedule:

- To turn off Descale notification, follow the full descaling procedure as outlined in this guide.
- Please visit www.Keurig.com/Descale for instructions on using the Descale Pouch.
If the brewer has been in storage or hasn’t been used in days, run a cleansing brew before brewing your beverage. Periodically hand-wash the water reservoir lid and drip tray with warm soapy water and rinse clean.
CAUTION: Parts are not dishwasher safe.
NOTE: Do not dry the inside of the water reservoir with a cloth as lint may remain.

- K-Cup® Pod Holder
To remove the K-Cup® pod holder from the brewer, lift the handle and grasp the top of the K-Cup® pod holder with one hand while pushing up on the bottom of the K-Cup® pod holder from underneath with the other until it releases. After cleaning, align the K-Cup® pod holder with the opening using the two front ribs as a guide and snap into place from the top.
- Exit Needle
Remove the pod holder assembly and detach the funnel. Locate the exit needle on the inside bottom of the K-Cup® pod holder. Insert a straightened paper clip into the exit needle to loosen any coffee grounds.
- Funnel
Washing the funnel ensures a fresh beverage experience. The funnel should be washed regularly and can be removed from the K-Cup® pod holder by pulling on it until it pops off. To replace it, orient the snaps to the indent and just snap it back onto the K-Cup® pod holder.
- Entrance Needle
Lift the brewer handle and locate the entrance needle on the underside of the lid. To clean the holes in the needle, hold the brewer handle in the upward position, and with your other hand, carefully insert a straightened paper clip into all the holes. Gently move it around to loosen any coffee grounds. Lower the handle completely and run a cleansing brew two times. Do not insert a K-Cup® pod.
Descaling Procedure
Note: the full descaling procedure must be completed to turn off the Descale light.
You will need a large ceramic mug (14oz minimum), fresh water, Keurig® Descaling Solution, and access to a sink. Do not use a paper cup. Ensure that there is no beverage pod in the K-Cup® pod holder. The descaling procedure takes approximately 20 minutes.
- STEP 1: Prepare the Brewer
Pour the entire bottle* of Keurig® Descale Solution into an empty water reservoir. Then, fill the empty bottle with water and pour it into the water reservoir. - STEP 2: Descale the Brewer
To activate Descale Mode, begin with the brewer plugged in and powered off, then press and hold the 8oz and 12oz buttons together for 3 seconds. When flashing, press the 12oz button to start the descaling process. - STEP 3: Fresh Water Rinse
Empty the water reservoir, rinse the tank, and refill to the MAX fill line with fresh water. When flashing, press the 12oz button to start the rinsing process. Once the brew is complete, pour the hot liquid into the sink. Continue to brew 12oz until the DESCALE notification turns off. The brewer has now exited Descale Mode and will be ready for use.
Troubleshooting
Grounds in Your Coffee
Grounds may have gathered in the exit or entrance needles and can be cleaned using a straightened paper clip or similar tool.
- Clean the exit needle of the K-Cup® pod holder. Refer to the Exit Needle care instructions.
- Clean the brewer entrance needle. Refer to the Entrance Needle care instructions.
For optimal enjoyment and to limit grounds in your cup during hot water brews or when transitioning from brewing a coffee pod to a non-coffee pod (i.e. tea or cocoa), clean the exit and entrance needle per the instructions provided and perform 2 cleansing brews.
Brewer Will Not Brew
- The water level must be at the minimum line to brew. Add 2oz of water to the reservoir to ensure the minimum fill level has been met, then press the size button. Repeat until the brewer begins to dispense.
- Lift and replace the reservoir to ensure a secure fit on the base.
Brewing a Partial Cup
- Power the brewer off. Press and hold the 12oz button for 5 seconds until water starts dispensing. Then release and let the water purge. Discard the contents into the sink. Press the power button to restart.
• The exit needle may be clogged. Refer to the Exit Needle care instructions.
• Clean the K-Cup® Pod Holder, see K-Cup® Pod Holder care instructions.
• The brewer may need to be descaled. If you have repeated the descaling procedure on your brewer two times and it is still only brewing a partial cup, contact Customer Service.
Brewer Does Not Have Power or Shuts Off
- Make sure that the power button has been turned on.
- Plug the brewer into its outlet. If the electric circuit is overloaded with other appliances, your brewer may not function properly. The brewer should be operated on its circuit, separate from other appliances.
- For energy savings, the brewer automatically turns off 5 minutes after the last brew. Press the power button to restart.
- If the brewer still doesn’t have power, contact Customer Service.
Storage
Empty the water reservoir before storing or transporting and take care to ensure that you store your brewer in a safe and frost-free environment. When you prepare to use it after storage, we recommend rinsing the water reservoir with fresh water and descaling the brewer as detailed in the Descaling your Brewer section.
Warranty
LIMITED ONE-YEAR WARRANTY
Keurig Green Mountain, Inc. (Keurig) warrants that your brewer will be free of defects in materials or workmanship under normal home use for one year from the date of purchase. It is recommended that you register your brewer on keurig.com/new so that your purchase information will be stored in our system.
Keurig will, at its option, repair or replace a defective brewer without charge upon its receipt of proof of the date of purchase. If a replacement brewer is necessary to service this warranty, the replacement brewer may be new or reconditioned. If a replacement brewer is sent, a new limited one-year warranty will be applied to the replacement brewer.
WHAT IS NOT COVERED BY THE LIMITED WARRANTY?
THIS WARRANTY DOES NOT COVER CONSEQUENTIAL OR INCIDENTAL DAMAGES SUCH AS PROPERTY DAMAGE AND DOES NOT COVER INCIDENTAL COSTS AND EXPENSES RESULTING FROM ANY BREACH OF THIS WARRANTY, EVEN IF FORESEEABLE.
Some states or provinces do not allow the exclusion or limitations of incidental or consequential damages, so the above limitation or exclusion may not apply to you depending on the state or province of purchase.
HOW DO YOU OBTAIN WARRANTY SERVICE?
Keurig® brewers are high-quality appliances and, with proper care, are intended to provide years of satisfying performance. However, should the need arise for warranty servicing, simply call Keurig Customer Service at our toll-free phone number 1.866.901.BREW (2739).
Please do not return your brewer for servicing without first speaking to Keurig Customer Service to obtain a Return Materials Authorization (RMA) number. Keurig® brewers returned without an RMA number will be returned to the sender without servicing.
Click or Call
Have Questions?
We’re here to help. Visit Support.Keurig.com for step-by-step videos on cleaning, descaling, and more.

Still Need Help?
Give us a call at
1-866-901-BREW (2739)
Coffeehouse taste in your own home
FIND YOUR PERFECT POD
With over 75 brands and hundreds of varieties, find your match at Keurig.com/New
FAQs About Keurig K-Express Coffee Maker Use and Care
Is there a filter on the Keurig K-Express Essentials?
ASSORTS VARIOUSLY SOLD: Accompanying the Walmart K-Express Essentials purchase are the Tall Handle Water Filter Starter Kit and My K-Cup Universal Reusable Filter, which are available for buy separately.
How is the Keurig K-Express cleaned?
Huge mugs should be set on the drip tray. The coffee maker must first be plugged in and turned off to enter Descale Mode. Next, press and hold the 6 and 10-ounce buttons simultaneously for three seconds. To begin the descaling process, hit the 8 oz button while it is flashing. After the brew is finished, transfer the heated mixture into the washbasin.
How much time does a Keurig take to descale?
Make sure the K-Cup® pod holder is empty of any beverage pods. The process of descaling takes about twenty minutes. Fill a reservoir with empty water and pour the entire bottle of Keurig® Descale Solution into it. After that, pour the water from the empty bottle into the water reservoir.
Can you use a Keurig K Express with your coffee?
Yes, the Keurig® My K-Cup® Universal Reusable Coffee Filter is compatible with the K-ExpressTM coffee maker.
Do reusable pods get used with the Keurig K Express?
Are you trying to find a reusable K-Cup that works with K-Express Essentials? Go no further—Perfect Pod has everything you need. You have two options for using the K-Express Essentials: a reusable filter cup with paper filters inside or a permanent mesh filter.
Is it possible to clean my Keurig machine with vinegar?
White vinegar is a good cleaning solution to have on hand if you don’t have any Keurig descaling solution. You should use the same amount of vinegar and water. Add white vinegar to the reservoir until it is about halfway full, and then top it off with water.
Is it possible to clean my Keurig with rubbing alcohol?
In conclusion, you shouldn’t clean your coffee machine with isopropyl alcohol.
How often should I clean my Keurig machine?
every three to six months. Scale, or calcium deposits, can accumulate within coffee makers over time and are removed by this technique. Although scale and calcium are not harmful, they can impair the functionality of your brewer if ignored. Descaling should occur every three to six months, or when the descale indicator illuminates for some brewers.
Is there a water filter in my Keurig?
Your Keurig water reservoir’s purifying filter is made to last a specific number of brew cycles, not an extended period. Your Keurig should require replacement less frequently the less you use it. According to Keurig, filters need to be replaced every two months.
Does Keurig make coffee in an instant?
Although your Keurig machine prepares hot coffee quickly—less than a minute—it is not “instant coffee.” The actual K-Cup is a sealed container that includes a paper filter and actual ground coffee. Your coffee is made in the same method as a freshly made pot but in a smaller size.
For More Manuals by Keurig, Visit Latest Manuals
- BUNN CSB2G Speed Brew Elite Coffee Maker Owner Manual
- Krups Simply Brew Stainless Steel Drip Coffee Maker Manual
- Hamilton Beach Programmable Coffee Maker User Manual
- Mr. Coffee 12 Cups Coffee Maker User Manual
- BLACK DECKER CM1160B 12-Cup Digital Coffee Maker Manual
|
Keurig K-Express Coffee Maker Use and Care Guide [pdf] |