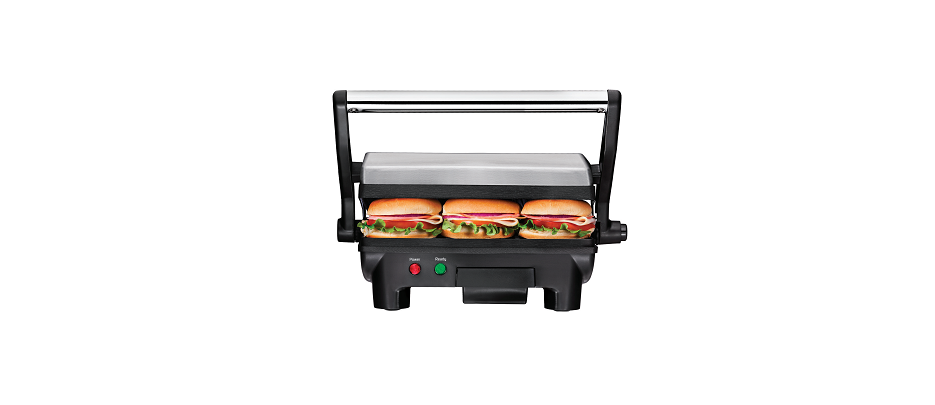
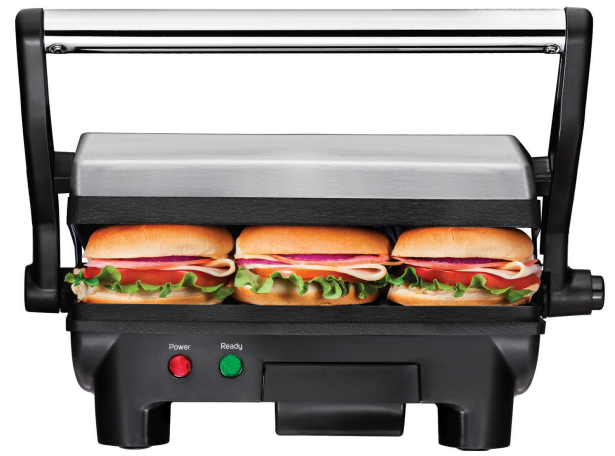
Chefman Electric Panini Grill
Introduction
Congratulations!
You have made an excellent choice with the purchase of this quality Chefman® product. By doing so you now have the assurance and peace of mind which comes from purchasing a product that has been manufactured to the highest standard of performance and safety, supported by the high-quality standards of Chefman®.
We want you to be completely satisfied with your purchase so this Chefman® product is backed by a comprehensive manufacturer’s 1-year warranty and an outstanding after-sales service through our dedicated Helpline. We hope you will enjoy using your purchase for many years to come. If you require technical support or in the unlikely event that your purchase is faulty please telephone our Helpline for immediate assistance.
Faulty product claims made within the 1-year warranty period will be repaired or replaced free of charge provided that you have satisfactory proof of purchase (keep your receipt). This guarantee is in addition to your statutory rights. Your statutory rights are not affected.
This limited warranty does not apply in cases of damage caused by accident, improper use, abuse, or force majeure. This warranty gives you specific legal rights. You may have other legal rights that vary depending on where you live. Some states or provinces do not allow limitations on implied warranties or special, incidental, or consequential damages, so the foregoing limitations may not apply to you.
This limited warranty will be invalidated if the appliance is tampered with in any way whatsoever. In case of questions or technical problems please call the following toll-free helpline number: 888-315-6553, Monday – Friday 9 am to 5 pm EST. If the appliance has to be returned to us, it must be packed correctly as we cannot accept any responsibility for damage caused in transit. We recommend you use a traceable, insured delivery service.
SAFETY INSTRUCTIONS
WARNING: When using electrical appliances especially when children are present, basic safety precautions should always be followed to reduce the risk of fire, electric shock, and/or injury to persons, including the following:
- READ ALL INSTRUCTIONS BEFORE USING.
- The cord to this appliance should be plugged into a 120VAC electrical outlet only.
- To protect against the risk of electric shock, do not immerse the cord plug or cooking unit in water or any other liquid.
- Do not touch hot surfaces. Use handles.
- This appliance is not intended for use of persons (including children) with reduced physical, sensory, and mental capabilities, or lack of experience and knowledge unless they have been given supervision or instruction concerning the use of the appliance by a person responsible for their safety.
- Close supervision is necessary when the appliance is used by or near children.
- Unplug from the wall outlet when is not in use and before cleaning. Allow to cool before cleaning or storing this appliance.
- Never yank the cord to disconnect the cooking unit from the electric outlet. Instead, grasp the plug and pull to disconnect.
- Do not operate any appliance if the cord is damaged. Do not use this appliance if the unit malfunctions, or if it is dropped or has been damaged in any manner. To avoid the risk of electric shock, never try to repair the unit yourself. Bring it to a qualified technician for examination, repair, or electrical or mechanical adjustment. An incorrect assembly could present a risk of electric shocks when the unit is used.
- The use of accessories or attachments not recommended by the manufacturer may cause fire, electrical shocks, or injury.
- Do not use it outdoors or for commercial purposes.
- Do not use this appliance for purposes other than the one for which it was designed.
- Do not let the electrical cord hang over the edge of the table or countertop, or touch a hot surface.
- Do not place it on or near a hot gas, electric burner, or heated oven.
- Use on a heat-resistant flat-level surface only.
- Use extreme caution when moving any appliance containing hot food, water, oil, or other liquids.
- To disconnect, turn the control to “OFF,” then remove the plug from the outlet.
- Always unplug after use. The appliance will remain “ON” unless it is unplugged.
- CAUTION HOT SURFACES: This appliance generates heat during use. Proper precautions must be taken to prevent the risk of burns, fire, or other damage to persons or property.
- When using this appliance, provide adequate ventilation above and on all sides for air circulation. Do not allow this appliance to touch curtains, wall coverings, clothing, dishtowels, or other flammable materials during use.
- Use with wall plug receptacle only.
- Do not use for other than intended use.
- Always preheat for approximately 3 minutes.
SHORT CORD INSTRUCTIONS
A short power supply cord is provided to reduce the hazards resulting from entanglement or tripping over a longer cord. Longer detachable power-supply cords or extension cords are available and may be used if care is exercised in their use. If a longer detachable power-supply extension cord is used:
- The marked electrical rating of the cord set or extension cord should be at least as great as the electrical rating of the appliance, and:
- The cord should be arranged so that it will not drape over the countertop or tabletop where it can be pulled on by children or tripped over unintentionally.
LINE CORD SAFETY TIPS
- Never pull or yank on a cord or the appliance.
- To insert the plug, grasp it firmly and guide it into an outlet.
- To disconnect the appliance, grasp the plug and remove it from the outlet.
- Before each use, inspect the line cord for cuts and/or abrasion marks. If any are found, this indicates that the appliance should be serviced and the line cord replaced. Please return it to an authorized service representative.
- Never wrap the cord tightly around the appliance, as this could place undue stress on the cord where it enters the appliance and cause it to fray and break.
Features
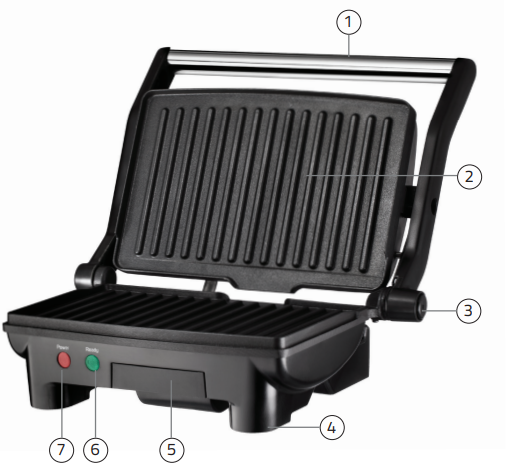
- Handle
- Non-stick grill plates
- Lay-flat release button
- Pull-out tilting feet
- Removable drip tray
- Ready light
- Power light
Operating Instructions
BEFORE USING FOR THE FIRST TIME
- Carefully unpack the panini maker and remove all labels, packaging, and materials.
- Before using your panini maker for the first time, wipe the cooking plates with a damp cloth to remove all dust, and then dry them.
WARNING: Never use metal scouring pads, or harsh or abrasive cleaners on any part of the panini maker. - Wipe outer surfaces with a slightly damp, soft cloth or sponge.
- For best results, pour a teaspoon of vegetable oil onto an absorbent kitchen towel. Spread onto the non-stick grill plates. Wipe off any excess oil.
CAUTION: Take care to prevent water from running into the appliance. NEVER IMMERSE THE PANINI MAKER IN WATER OR ANY OTHER LIQUIDS. - Slide the removable drip tray into the bottom front of the unit. Push firmly to ensure the drip tray is securely installed.
- Set the appliance on a dry, clean, and flat surface. Keep the panini maker clountilntiI used.
PANINI HINTS FOR BEST RESULTS
- It is best to prepare panini(s) from a hearty loaf of bread. However, panini(s) made from the store, sliced bread, or rolls can be delicious and simple to make. Experiment with a variety of breads, tortillas, flatbreads, and even pitas.
- For health-conscious cooks, the non-stick coating of grill plates assures a crisp and delicious toasting without the use of oil or butter. The raised ridges and tilted bottom plate, allow grease and other liquids to drip off into the drip tray and away from your food.
- With the panini maker’s non-stick grill plates, it is not necessary to use butter or oil on the outside of the bread. However, spreading a small amount of butter or olive oil is recommended to encourage even browning of the bread.
- NOTE: Do not use non-stick sprays as they can cause build-up on the grill plates. Use olive oil instead.
- WARNING: Do not use non-fat spreads. They may burn and damage the nonstick grill plates.
- Always preheat the panini maker before each use.
- Have all the ingredients at hand before preparing the panini.
- When using soft or liquid fillings, use thicker slices of bread. Try removing the inside of the bread to create a cup form in which filling can be added.
- Most fresh fruits release juice when heated. If a recipe calls for canned fruit, drain and dry the fruit with a clean paper towel.
- Avoid using processed cheeses, as they tend to melt under high temperatures.
- A teaspoon of sugar sprinkled inside the insimakesese tpanderedred pandore crispier and adds flavor when using sweet fillings.
Cleaning and Maintenance
USER MAINTENANCE INSTRUCTIONS
The appliance requires little maintenance. It contains no user-serviceable parts. Do not try to fix it yourself. Contact a qualified appliance repair technician if the product requires servicing.
CARE & CLEANING INSTRUCTIONS
CAUTION: Unplug from the electrical outlet and allow cooling thoroughly before removing the drip tray or cleaning the unit.
- The panini maker does not disassemble for cleaning.
- Never immerse this appliance in water or other liquids. Never place the panini maker in the dishwasher.
- Slide the removable drip tray out from the bottom of the unit. Clean it with hot soapy water.
NOTE: The removable drip tray is top-rack dishwasher safe.
IMPORTANT: Always clean the drip tray before use. NEVER OPERATE THE PANINI MAKER WITHOUT THE DRIP TRAY PROPERLY IN PLACE. - The panini cooking plates should be cleaned and conditioned before each heating.
- Brush non-stick cooking plates with a clean soft pastry brush or cloth, to condition the plates; lightly coat the cooking surfaces with solid vegetable shortening or vegetable oil. Carefully follow the suggested cleaning procedures below. After a time, if the panini(s) show signs of sticking, recondition as needed.
- To protect the premium quality non-stick surfaces, use only plastic, nylon, or wooden utensils.
- To remove any butter baked onto the cooking plate, pour a small amount of cooking oil onto the hardened butter. Allow to set for 5 minutes, and then wipe softened butter off with a paper towel or soft cloth. To remove stubborn stains use a plastic mesh puff or pad. A clean toothbrush works well to remove baked-on butter from the grids. For best results, use only products with directions stating they are safe for cleaning non-stick cooking surfaces. Do not use steel wool or coarse scouring pads.
- The exterior finish should be cleaned with a non-abrasive cleaner and a soft, damp cloth. Dry thoroughly.
STORING INSTRUCTIONS
- Make sure the unit is unplugged and fully cooled.
- Turn the panini maker over. The feet will be in a raised position.
- Press the center tab of each of the feet. Each foot will tilt back and fit into the recessed area.
Terms and Conditions
Limited Warranty
CHEFMAN LLC warrants, subject to the conditions stated below, that from the date of purchase, this product will be free from mechanical defects for a period of ONE (1) year. CHEFMAN LLC, at its option, will repair or replace this product found to be defective during the warranty period. Should this product become defective because of improper workmanship or material defect during the specified warranty period, CHEFMAN LLC will repair or replace the same affecting all necessary parts replacements for one year from the date of purchase.
If the product is no longer available we will replace it with a product of equal value. Transportation charges on parts, or products in whole, submitted for repair or replacement, under this warranty, must be borne by the purchaser. This warranty is void if the product is used for other than single-family household use or subjected to any voltage and waveform other than as specified on the rating label (e.g., 120V ~ 60 Hz).
This warranty is available to consumers only. You are a consumer if you own a CHEFMAN® product that was purchased at retail for personal, family, or household use. Except as otherwise required under applicable law, this warranty is not available to retailers or other commercial purchasers or owners.
CONDITIONS: This warranty is valid for the original USA and Canada retail purchaser from the date of the initial retail purchase and is not transferable. Keep the original sales receipt. Proof of purchase is required to obtain warranty service or replacement.
Dealers, service centers, or retail stores do not have the right to alter, modify or in any way, change the terms and conditions of this warranty. Warranty registration is not necessary to obtain a warranty on CHEFMAN LLC Products. Save your proof of purchase receipt.
CALIFORNIA RESIDENTS ONLY:
California law provides that for In-Warranty Service, California residents have the option of returning a nonconforming product (A) to the store where it was purchased or (B) to another retail store that sells Chefman products of the same type.
The retail store shall then, at its discretion, either repair the product, refer the consumer to an independent repair facility, replace the product, or refund the purchase price less the amount directly attributable to the consumer’s prior usage of the product. If the above two options do not result in the appropriate relief to the consumer, the consumer may then take the product to an independent repair facility if service or repair can be economically accomplished.
Chefman and not the consumer will be responsible for the reasonable cost of such service, repair, replacement, or refund for nonconforming products under warranty. CHEFMAN is a registered trademark of PLUS ITS CHEAP, LLC.
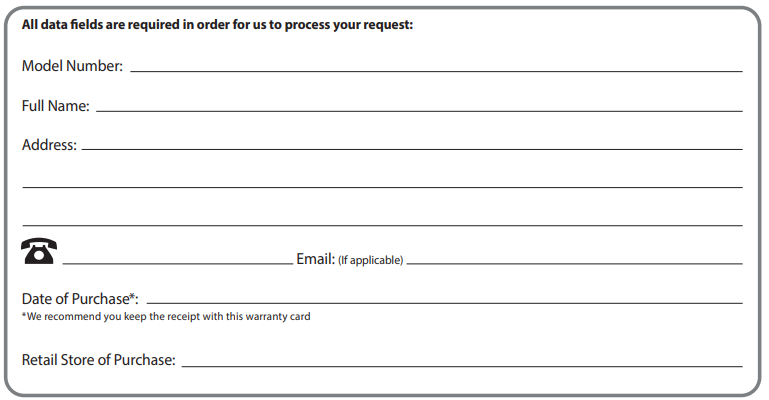
Warranty Card
AFTER-SALES SUPPORT
888-315-6553
customerservice@chefman.com
MODEL: RJ02-180
For More Manuals by Chefman, Visit Latest Manuals
FAQs About Chefman Electric Panini Grill
How hot does a panini grill get?
More versatility: most panini presses have an adjustable temperature control as standard. The most popular range is between 120 and 570 degrees Fahrenheit, which you can use to either warm tortillas or reach extremely high temperatures for cleaning and seasoning.
Are paninis hot or cold?
Panino is frequently a shortened form of panino imbotitto, or “stuffed roll,” which is a sandwich made of one or two components plus a cut-open bread roll. In Italy, they are frequently cooked at home or served in cafés, bars, and “paninotecas.” Although it can be warmed in a sandwich press, a panino can also be served cold.
What kind of bread is used for panini?
These consist of rye, French, sourdough, focaccia, and ciabatta. However, your slices should always be around ½ inch thick, regardless of the bread you use. When you bite into your panini, the bread will taste far too strong if you use slices thicker than that.
How to season a panini grill?
Season your panini grill: This will prevent rust and food from sticking to the grill. After cleaning and drying your panini grill thoroughly after using it for the first time, lightly coat the cast-iron plates with cooking oil and preheat to the highest temperature.
Are paninis heated?
A panini (/pəˈniːniː/; currently, less commonly called panino, Italian: [pa’niːno]) is a heated sandwich that is typically served after toasting or grilling Italian bread, such as ciabatta and machete.
Can you use parchment paper on a panini grill?
Simply use parchment paper! When using a panini press, wrap your sandwich with parchment paper to keep everything inside neatly and prevent a messy cleanup. Additionally, parchment paper will guarantee that your dough does not adhere to the tortilla press, providing you with the greatest results every time!
Is a panini healthy?
Before you are ready to serve, prepare the paninis in advance and grill them. The best way to reheat sandwiches is in a toaster oven, which takes around 8 to 10 minutes at 275 degrees.
Are paninis fried?
The Italian word panini refers to a little bread roll or bread. Consequently, a grilled sandwich on Italian bread is called a panini sandwich. Typically, paninis are made with baguette, rosetta, manchette, or ciabatta, among other Italian bread varieties.
Can you cook fish on a panini grill?
Put the packet of salmon onto the sandwich grill. Without pressing the packet, close the lid so that the grates come into contact with it. For ten minutes, grill. Take the packet from the grill and let it rest for two to three minutes before carefully opening it.
Does a panini grill need a hood?
Although a grease hood is not necessary, be advised that some municipalities may need a ventilation hood with the usage of panini machines because they are classified as cooking equipment.

