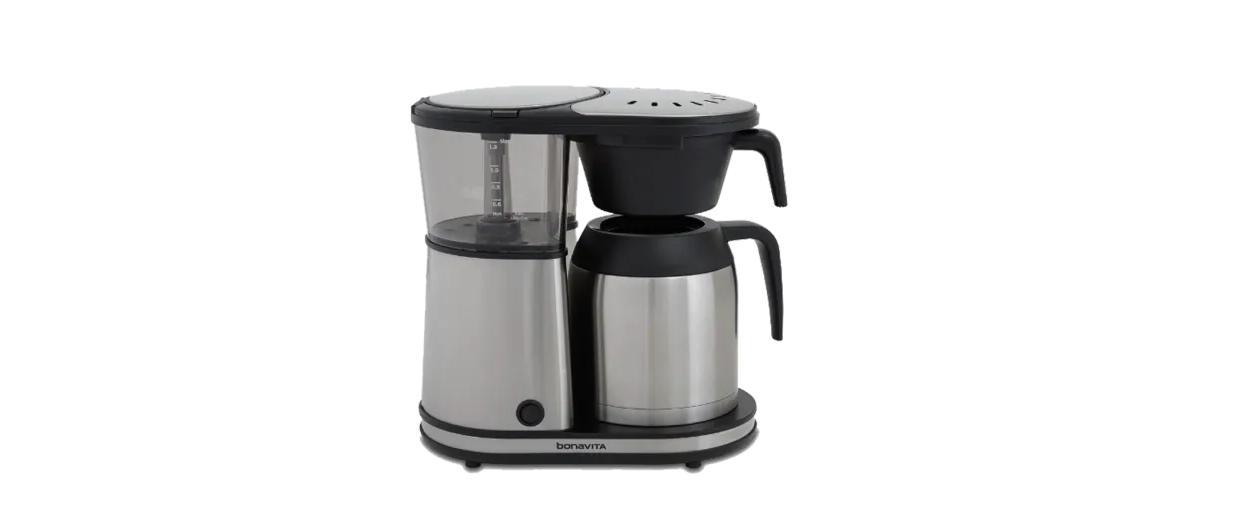
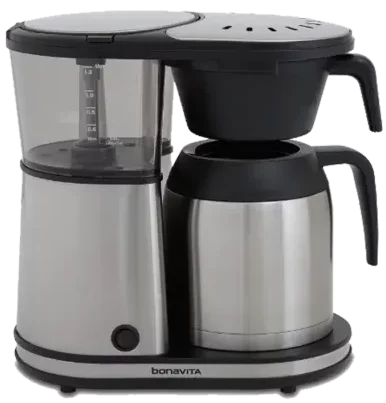
Bonavita BV1901TS 8 Cup Connoisseur Drip Coffee Maker
About Bonavita
Our goal at Bonavita is to make sure you live a happy and fulfilling life. And that entails producing outstanding kitchen appliances that improve the quality and ease of your mornings.
Simple, delightful, and fulfilling morning experiences are produced with less fuss thanks to our selection of coffee makers and nut processors. Conveniently located items that are carefully crafted to give you a good start to the day.
Bonavita Brewers were among the first to receive the Golden Cup Standard, which is used to gauge the quality of coffee, and became Specialty Coffee Association (SCA) Certified in 2012.
Consequently, our brewers played a key role in establishing the requirements for SCA Certification and informing the public about the Golden Cup Standard, which is why it has become a well-known name for those looking for outstanding home brewers.
Ever since we have been creating brewers by the same global standard for excellent coffee. World Coffee contests use our coffee brewers to calibrate their tastes.
INFORMATION
- Simple to operate
- Optional pre-infusion cycle for better extraction of freshly roasted coffee
- Flat bottom filter for even extraction
- Large shower head for even saturation of coffee grounds
- Advanced heating control for fast warm-up of brew water
- Durable stainless steel lined carafe
IMPORTANT SAFEGUARDS
This appliance is for household use only. When using electrical appliances, basic safety precautions should always be followed to avoid fires, electric shocks, burns, or other injuries and damage.
Read these operating and safety instructions carefully. Call our toll-free customer service number for information on examination, repair, and adjustments; do not attempt to repair the appliance yourself.
Read all instructions.
- Do not touch hot surfaces – use the handles or knobs.
- Do not immerse the cord, plugs, or appliance in water or other liquids.
- Unplug from the outlet when not in use and before cleaning. Allow to cool before putting on or taking off parts, and before cleaning the appliance.
- If children are present while the appliance is in use, keep them a safe distance away.
- Do not operate the appliance if its cord, plug, or various parts have been damaged.
- The use of accessory attachments is not recommended by the appliance manufacturer and may result in fire, electrical shock, or personal injury.
- Do not use it outdoors or in damp areas.
- Do not let the cord hang over the edge of a table or counter.
- Do not place the appliance on or near a hot electric or gas burner, or in a heated oven.
- To disconnect the appliance, first turn the power switch off, then remove the plug from the wall outlet.
- Fully insert the filter basket until it snaps into place and the indicator on the filter basket handle is fully covered.
- Remove the carafe’s lid before brewing.
- Do not use this appliance for anything other than its intended use.
- Place the appliance on a flat-level surface.
- Do not attempt to operate the appliance without putting water in the tank.
- Only fresh, cold water should be used in the tank. Do not use hot water.
- Never remove the carafe or filter basket during the brewing cycle.
- Do not use a carafe with a loose or damaged handle.
- Do not clean the carafe with abrasive cleansers, steel wool pads, or other abrasive materials.
- Do not remove the bottom cover from the appliance. There are no user-friendly parts inside.
- The carafe is designed for use with this appliance. It must never be used on a range top.
- Make sure that the voltage in your home corresponds with the voltage indicated on the bottom of the appliance.
- Do not attempt to operate the appliance if it only works intermittently, or stops working altogether.
SAVE THESE INSTRUCTIONS!
EXTENSION CORDS
A short power supply cord is provided to reduce the risk of tangling and tripping. Longer detachable power-supply cords or extension cords are available
and may be used if care is exercised. If a detachable power-supply cord or extension cord is used:
- The electrical rating of the extension cord should be appropriate for the electrical rating of the appliance.
- The longer cord should be arranged so that it will not drape over the countertop or tabletop where it can be tripped over, snagged, or pulled on, especially if children are present.
POLARIZED PLUG
This appliance has a polarized plug, which means that one blade is wider than the other. To reduce the risk of electric shock, this plug is designed to fit into a polarized outlet only one way.
If the plug does not fully fit into the outlet, reverse it. If it still does not fit, contact a qualified electrician. Do not attempt to modify the plug.
DESCRIPTION
- Water tank lid
- Brewer lid
- Water level indicator
- On/off switch
- Filter basket
- Filter basket indicator
- Thermal carafe lid
- Stainless steel thermal carafe
Operating Your Coffee Brewer
BEFORE FIRST USE
- Remove packaging materials, labels, and stickers from the coffee brewer.
- Clean the appliance by filling the water tank with clear, cold water to the maximum level mark. Fully insert the filter basket until it snaps into place and the indicator on the filter basket handle is fully covered. Place the carafe with the lid removed under the filter basket. Turn the coffee brewer on to allow the water to run through.
- Let the appliance cool down for 5 minutes before repeating the process. Brew only water through the coffee brewer at least 2 times before brewing any coffee.
USING THE COFFEE BREWER
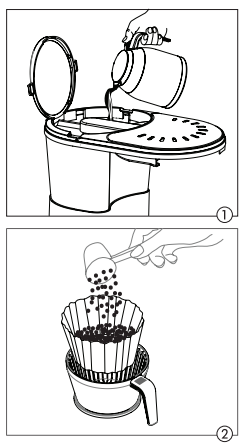
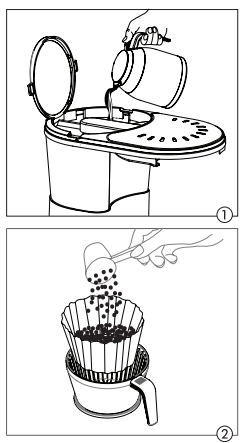
- Remove the thermal carafe and slide the filter basket out of the brewer.
- Raise the lid of the water tank and pour 4-8 cups of fresh cold water into the tank (Fig. 1). Do not fill above the MAX fill line.
- Place a basket-style filter in the filter basket. We recommend a basket filter with a 3 1/4” base dimension. Scoop ground coffee into the filter. We recommend two-level tbsp. of drip grind coffee per cup, varying the amount according to your taste (Fig. 2). This equates to approximately 7 to 9 grams of coffee per cup.
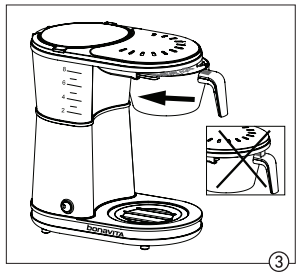
- Slide the filter basket back into the holder until it snaps into place and the indicator on the filter basket handle is fully covered. (Fig. 3).
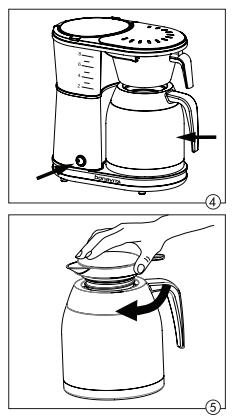
- Place the carafe with the lid removed under the filter basket. Switch the appliance on. The on/off switch will light up to show that the machine is operating (Fig. 4).
- After the brewing process ends, a beep will be heard once the cycle is complete, remove the coffee-filled carafe from the appliance. To dispose of the used filter and coffee grounds, we recommend dumping them from the filter basket. Rinse the filter basket out, and set aside to dry.
- To pour and for maximum heat retention, place the lid on the carafe shortly after the brew cycle is complete. (Fig. 5).
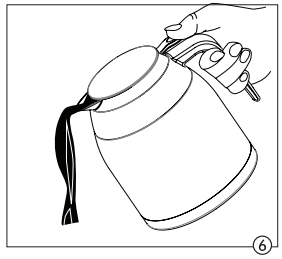
- For pouring coffee from the thermal carafe, depress the lever on the carafe’s lid. The lid must be tightened firmly to allow for one-handed pouring (Fig. 6).
- The appliance is equipped with an automatic shut-off function which triggers when the brew cycle is complete. The appliance can be switched off manually at any time by using the on/off switch.
COFFEE QUALITY, FRESHNESS AND GRIND
The quality of the coffee has a great impact on brewed coffee’s flavor. Using freshly roasted coffee and grinding the beans just before brewing are important considerations.
We recommend using coffee that was roasted in the last 30 days for the best flavor. In addition, we encourage the use of an air-tight container or sealed bag stored in a dark cabinet to help extend your coffee’s lifespan.
COFFEE TO WATER RATIO
Applying the same ratio of water to coffee grounds each time you brew will result in a more consistent cup of coffee. Using a scale to weigh your coffee is the best way to stay consistent, but we understand that might not always be possible.
We also recommend brewing in 6 or 8-cup batches. In the case of Bonavita brewers, 1 cup is equal to 5oz. Using the tools that you have at your disposal, here is what we recommend for your Bonavita brewer:
Brewing time is approximately 6 minutes for 8 cups of coffee. This will allow for proper water flow and saturation time of the coffee grounds.
Cleaning and Maintenance
This manual includes some helpful guidance for maintaining your brewer over time to ensure consistent performance and flavorful beverages. The brewer contains no internal user-serviceable parts, and it’s best to leave servicing and repairs to the experts at CustomerSupport@BonavitaWorld.com Proper care will ensure years of service from this coffee brewer.
Aside from keeping the brewer clean and descaling when necessary, there is no user maintenance required.
This appliance contains no internal user-serviceable parts. Leave servicing and repairs to qualified personnel. Use a soft, damp cloth and a mild dish-cleaning liquid for cleaning the carafe and the housing. Make sure to rinse thoroughly.
The filter basket, brewer lid, and carafe lid may be cleaned on the top rack of the dishwasher. We recommend periodically running coffee machine cleaning powder through your brewer.
Please follow the instructions included with your product purchase.
ADDITIONAL INSTRUCTIONS FOR THERMAL CARAFE:
The stainless steel-lined carafe is manufactured to the highest standards and will last for many years if handled properly. For cleaning, we recommend using coffee machine cleaning powder, which is especially effective for removing stubborn stains such as lime or coffee residue.
- If coffee is left in the carafe for too long, the stainless liner will become discolored. Removing the discoloration is best done with a good quality biodegradable and phosphate-free coffee machine cleaning powder.
- Do not use scrubbing pads or hard-bristled brushes, which will damage the stainless steel liner.
- Do not use the carafe as a vessel for ice cubes, carbonated drinks, milk products, or baby food.
- Never lay the thermal carafe on its side when it is full, even if the lid is firmly attached.
- Do not clean the thermal carafe in a dishwasher or immerse it completely in water.
CLEANING THE BREWER LID AND SHOWER HEAD:
Always unplug the coffee brewer before cleaning. The brewer lid with a built-in shower head is removable and can be cleaned on the top rack of the dishwasher.
- Carefully pull the front edge of the brewer lid to remove it.
- Clean.
- e-install lid.
CLEANING THE CARAFE LID:
The carafe lid should be disassembled for cleaning.
- Twist the lid cap counterclockwise and lift off.
- Clean the inner parts of the lid.
- Align cap recesses with spout and carafe lid lever and press on to the lid.
- Twist the cap clockwise to lock it in place.
DESCALING
In hard-water areas, scale from limestone content in the water may build up in your machine. Scaling can lead to extended preparation time and possible damage to your coffee brewer. We suggest that you describe your brewer after every 100 brew cycles, or once every three months.
However, if the appliance makes an unusually loud noise, delays brew time, or fails to achieve the proper water temperature of 197.6º-204.8ºF (92°-96°C), you may need to descale more often.
We recommend periodically using a good quality biodegradable and phosphate-free coffee machine cleaning powder. One is designed to break down mineral build-up inside your brewer to ensure great coffee and consistent functionality.
Vinegar may not effectively descale your brewer and can be difficult to rinse thoroughly. Vinegar may also leave behind an odor that can impact the flavor of your coffee.
- Follow instructions on coffee machine cleaning powder
- Pour into Bonavita water reservoir
- Brew
- Repeat twice with fresh, cold water
TECHNICAL DATA
- Rated voltage: AC 120 V, 60 Hz
- Rated current: 12.5 A
- Rated power input: 1500 W
Limited Warranty
1-year limited warranty from the date of original purchase.
- This warranty extends only to the original retail purchaser or gift recipient. Keep the original sales receipt, as proof of purchase is required to make a warranty claim.
- Defects that occurred due to improper connection, improper handling, or repair attempts by non-authorized persons are not covered by the warranty. The same applies to failure to comply with the use of consumables (e.g. cleaning and decalcifying agents) that do not correspond to the original specifications.
- This device was designed and built for household use only. It is not suited for other uses.
- Damages that are not the responsibility of the manufacturer are not covered by the warranty. This is valid, especially for claims arising from improper use (e.g. operation with insufficient current or improper voltage).
- The guarantee becomes void if repairs are carried out by third parties not authorized by the manufacturer and/or if spare parts are used other than the original ones.
Please call 1-855-664-1252 or email
CustomerSupport@BonavitaWorld.com for warranty claims.
Customer Service Line:
USA 1-855-664-1252
1-year limited warranty
BonavitaWorld.com
For More Manuals by Bonavita, Visit Latest Manuals
- Farberware 47053 Classic Yosemite 12-Cup Coffee Percolator User Manual
- Calphalon 14 Cups Programmable Coffee Maker Instruction Manual
- Bodum Chambord French Press Coffee Maker User Manual
- Russell Hobbs Glass Series 8-Cup Coffeemaker Instruction Manual
- De’Longhi Dedica EC680M Coffee Maker User Manual
 |
Bonavita BV1901TS 8 Cup Connoisseur Drip Coffee Maker Manual [pdf] |

