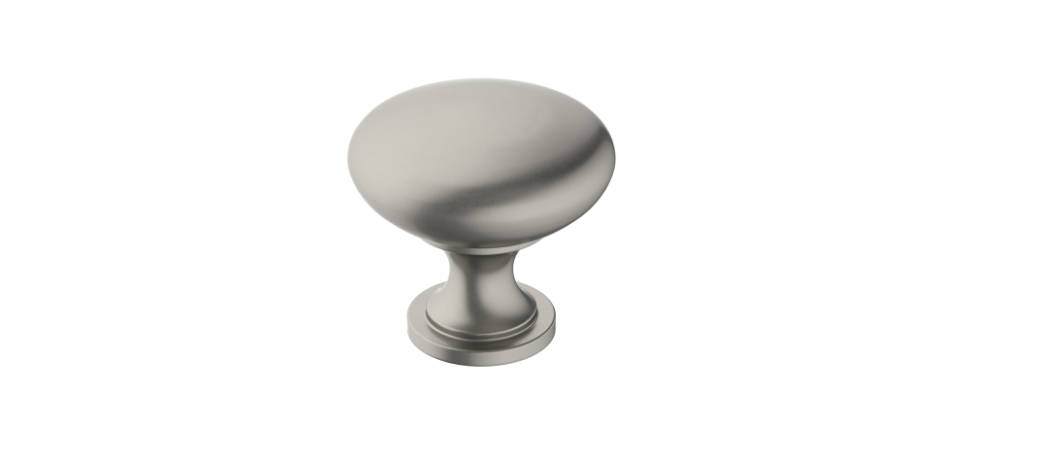
Amerock Era Cabinet Knob
About Amerock
After immigrating to Rockford, Illinois in 1907, Gedor and Ruben Aldeen formed the Aldeen Company in 1928. They renamed themselves the American Cabinet Hardware Corporation in the 1930s. After years of consistent success in the face of general economic adversity.
The company rebranded itself as Amerock in 1940 by combining the phrases Rockford and American. They bought the Ziock Building in 1946 and ran their operations on all thirteen floors. In 1950, the building’s six-story extension was constructed by the firm.
Installing New Cabinet Hardware
- Step 1. Location of Cabinet Hardware
While there are no hard, fast rules for the placement of a knob or pull on a cabinet door, most cabinet makers will locate them approximately 3″-4″ above the upper non-hinged corner on base cabinets, or the lower non-hinged corner on wall cabinets. However, the decision is yours to make!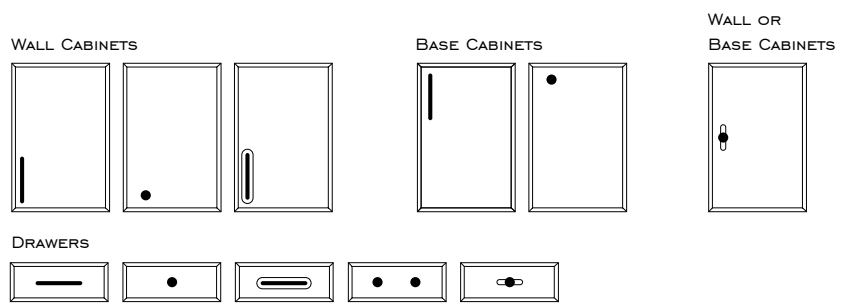
- Step 2. Mounting Cabinet Hardware
When drilling for a knob or pull, a 3/16″ hole is recommended for most styles. The exception is pulled that have “studs”. A stud is simply an extension of the molded screw holes. If a pull has a stud, then a 1/4″ hole is required with studs sitting securely in the wood.
IMPORTANT
Amerock ® includes 8-32 x 1″ long machine screws with most knobs and pulls because the typical cabinet door or drawer front is 3/4″ thick. This screw length should work in most applications. However, if your cabinet doors or drawer fronts are thicker than 3/4″, then you will need to use longer screws for mounting.
Check the thickness of both a cabinet door and a drawer front in your kitchen, as the thickness dimensions may not be the same. In general, the screw length(s) used should be 1/4″ longer than the thickness of your cabinet door or drawer front material. It is not uncommon for some drawers to be constructed with a 3/4″ thick front attached to a 3/4″ thick drawer box.
In this situation, the total drawer thickness is 1-1/2″, making a 1-3/4″ long screw necessary for mounting. These screws may be purchased from any hardware store. Please note that select hardware sold by Amerock may include metric screws instead of UNC screws.
Mounting Pulls
Sizes Available
- Pulls can be obtained in U.S. measurements as well as metric.
- Amerock offers a broad range of sizes to choose from.
How to Choose the Right Size
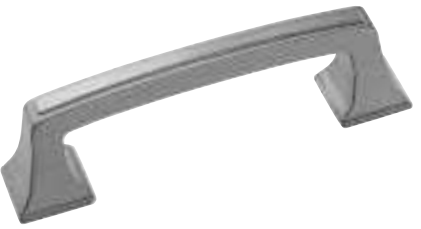
- Take note of all sizes available.
- 3″ is the most common size pull.
- Size is determined by measuring from hole to hole, not by the length of the pull itself
Installation Tips
If you are using a pull, you will want to determine the hole center spacing of the pull. 3″ hole centers are the most common, however, Amerock offers a wide variety of sizes. You may want to create or purchase a durable template before drilling to mark the mounting holes.
This will help to ensure that they are parallel with the door or drawer edge and that they are the same placement height on every cabinet.
WARNING! An example is provided below, however, do not use this for drilling purposes as printers may provide template distortions.
Common Hole Center Measurements
- 2-1/2 in.
- 2-3/4 in.
- 3 in.
- 3-1/4 in.
- 3-1/2 in.
- 96 mm
- 4 in.
- 128 mm
Mounting knobs
- Sizes Available
Knobs can be obtained in a variety of sizes, shapes, and diameters. Amerock offers a broad range of sizes to choose from. - How to Choose the Right Size
There are no right or wrong sizes when it comes to selecting the appropriate knob size. Choose the size that looks best in proportion to the size of your cabinet doors and drawers. A 1-1/4″ or 1-3/8″ diameter knob is the most popular. To create a dramatic effect, consider using a large (1-1/2″ diameter or greater) or small (1″ diameter or smaller) sized knob. Small sized knobs also work well on applications such as apothecary drawers, spice drawers, pullout cutting boards, etc. - Installation Tips
If you are installing a knob, it is suggested that you create or buy a durable template prior to drilling to mark the mounting hole. This will help to ensure that the knob is positioned properly on the cabinet door or drawer front and that there is the same placement height on every cabinet.
Replacing Cabinet Hardware
Pulls
When replacing pulls, the choices are numerous. You may choose to go with a pull with the same hole centers as your existing pull.
Pull size is determined by measuring from hole to hole, not by the length of the pull itself. However, if you do choose to use a pull that is longer or shorter, the following information will assist you:
- On wall cabinets, reuse the bottom hole and drill a new top hole
- On base cabinets, reuse the top hole and drill a new bottom hole
- On drawers, drill two new holes and realign in the center
Knobs
When replacing knobs, simply unscrew your old knob. Leaving the old screw in place, screw on your new knob. Nothing could be easier!
Backplates
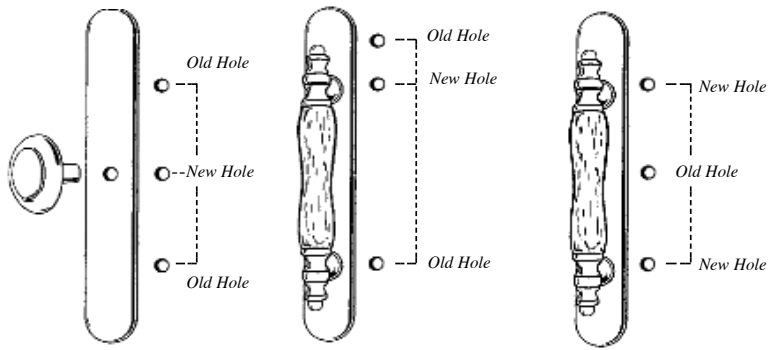
If you are switching sizes of pulls, or from a knob to a pull, or from a pull to a knob, there may be one or more exposed holes in the cabinet surface. To remedy this situation, you may choose to use a backplate.
- Backplates are used in conjunction with a knob or a pull. It is placed between the cabinet door or drawer surface and the knob or pull. Backplates will also help to protect the wood surface, and visually enhance the existing decorative hardware.
Note: If you are switching from a knob to a pull or from a pull to a knob, generally there will be one or more exposed holes in the cabinet surface!
The backplate will cover the old mounting holes.
- Switching from pull to knob
- Switching from 96mm pull to 3” pull
- Switching from knob to pull
CUSTOMER SERVICE
116 Exmore Road Mooresville, NC 28117 1-800-435-6959 © 2014, AMEROCK www.amerock.com
For More Manuals by Amerock. Visit LatestManuals

