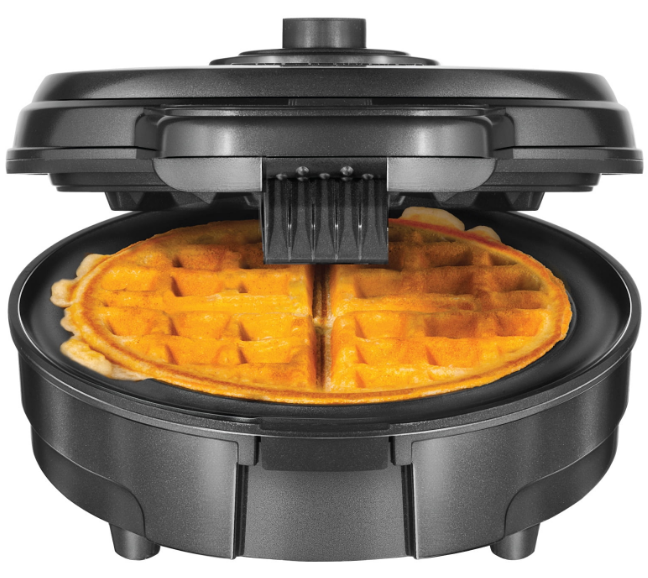
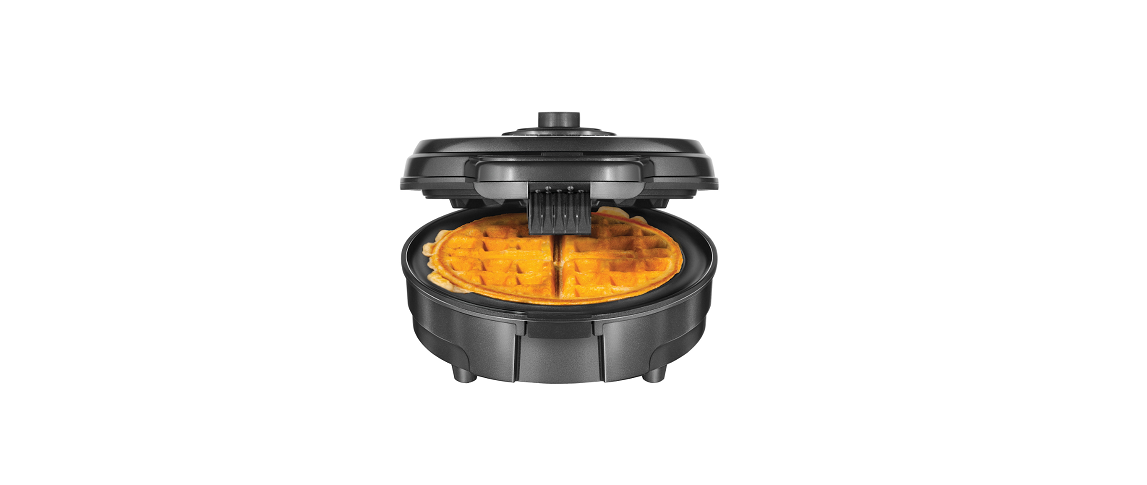
Chefman Anti-Overflow Belgian Waffle Maker

This is your one-stop guide to using your product. From the below links, you can jump ahead to a specific document if desired.
QUICK START GUIDE
BEFORE FIRST USE
- Remove all packaging materials and remove any stickers on the waffle maker (except for the rating label on the bottom, which should remain on the unit), and check to ensure that all parts and accessories are accounted for.
- Gently wipe down the exterior and interior with a damp cloth or paper towel to remove any packaging residue. Dry completely. Never immerse the waffle maker, or cord, or plug in water or any other liquids.
- Wash the measuring cup with warm, soapy water and a sponge.
- Read all instructions and follow them carefully.
FEATURES

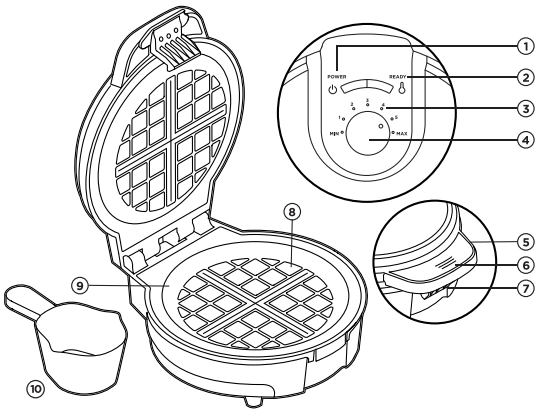
- Power Light
- Ready Light
- Shade Settings
- Shade Setting Knob
- Stay-Cool Latch Handle
- Latch Release Grip
- Locking Latch
- Nonstick Cooking Plates
- Batter Overflow Channel
- Moastirina Cun
WAFFLE MAKING TIPS
- When making waffle batter, mix just until large lumps disappear. Overmixing can make waffles tough.
- Adding mix-ins, such as fruit or chocolate chips, may take some experimenting. Try mixing them into a single waffle’s worth of batter at first to judge the ratio of batter to mix-in.
- Do not open the waffle maker during the first minute of cooking as the waffle may separate.
- If the top of the waffle maker resists when attempting to lift it after cooking the waffle, allow the waffle to cook for longer in 30-second increments.
- Waffle results will vary based on the brand of waffle mix or recipe used.
- If not serving waffles right away, keep them warm in a 200°F oven. Set a wire rack on a baking sheet and transfer waffles to the rack so air can flow beneath, keeping the waffles crisp.
- Cooked waffles freeze well. Let the waffles cool completely then transfer them to a zip-top plastic bag or wrap them in aluminum foil. Unwrap and reheat waffles in a toaster, toaster oven, or oven.
HOW TO USE
THE ANTI-OVERFLOW WAFFLE MAKER
- STEP 1
Prepare your waffle batter. - STEP 2
Plug in the waffle maker. The red POWER light will come on. - STEP 3
Select the desired shade setting from MIN (lightest) to MAX (darkest). - STEP 4
Use the included measuring cup to scoop the batter. TIP: Use 160 ml for thick batter and 125 ml for thin batter. - STEP 5
When the blue READY light comes on, carefully open the lid by pinching the latch handle. - STEP 6
Pour the batter into the center of the lower cooking plate and close the lid. The blue READY light will turn off while the waffle cooks. - STEP 7
When the blue READY light comes back on, carefully open the lid. WARNING: When opening the lid, hot steam may escape and cause burns. - STEP 8
Carefully remove the cooked waffle. (Do not use metal utensils as they can scratch the nonstick surface.) - STEP 9
To make more waffles, brush away any crumbs, then close the lid and let the waffle maker reheat until the blue READY light comes back on before adding more batter. - STEP 10
When finished making waffles, unplug the waffle maker to turn it off. Let it cool completely before cleaning and storing it in a cool, dry place.
CLEANING AND MAINTENANCE
- Unplug the waffle maker and let cool completely before cleaning.
- Use a soft bristle brush or a paper towel to brush away crumbs from the plates. Wash the measuring cup with warm, soapy water and a sponge.
- Gently wipe down the interior plates and the exterior (if necessary) with a damp cloth or paper towel and let dry completely. CAUTION: Never immerse the waffle maker, the cord, or the plug in water or any other liquids.
- Store the cord beneath the waffle maker and store the waffle maker upright to save space.
TERMS AND CONDITIONS
Limited Warranty
Our products are backed by a limited 1-year warranty. To register, follow the instructions on the Chefman® Warranty Registration page in this User Guide. We offer a limited 1-year warranty from the date of purchase.
This warranty is void without proof of purchase within the USA, Canada, or Mexico. Service centers and retail stores do not have the right to alter or change the Terms and Conditions of this warranty.
WHAT THE WARRANTY COVERS
- Manufacturer Defects
Chefman® products are warranted against defects in material and workmanship for 1 year from the date of purchase when used by the Chefman® User Guide. - Qualified Replacements
If your product does not work as it should, we will send you a new one. If the product is no longer available, we will replace it with one that is comparable.
THIS WARRANTY DOES NOT COVER
- Misuse – Damage that occurs from neglectful or improper use of products; damage that occurs as a result of usage with incompatible voltage. See Safety Instructions for information on proper use.
- Poor Maintenance – General lack of proper care. See Cleaning and Maintenance Instructions for information on proper maintenance.
- Commercial Use – Damage that occurs from commercial use.
- Altered Products – Damage that occurs from alterations or modifications by any entity other than Chefman®; removal of a rating label.
- Catastrophic Events – Damage that occurs from fire, floods, or natural disasters.
- Loss of Interest – Claims of loss of interest or enjoyment.
CHEFMAN® WARRANTY REGISTRATION
What do I Need to Register my Product?
- Contact Information
- Model Number
- Proof of Purchase (online confirmation, receipt, gift receipt)
- Date code
How Do I Register My Product?
We offer 2 convenient ways to access the Chefman® registration form:
- Visit chefman.com/register.
- Scan the QR code below to access the site:

For more product information, visit chefman.com
OTHER LIMITATIONS: ALL WARRANTIES OF ANY KIND WHATSOEVER, EXPRESS, IMPLIED AND STATUTORY, ARE HEREBY DISCLAIMED. ALL IMPLIED WARRANTIES OF MERCHANTABILITY AND FITNESS FOR A PARTICULAR PURPOSE ARE HEREBY DISCLAIMED, PROVIDED THAT IF ANY IMPLIED WARRANTIES OF ANY KIND ARE REQUIRED BY ANY JURISDICTION,
INCLUDING MERCHANTABILITY AND FITNESS FOR PARTICULAR PURPOSE, THE DURATION OF SUCH IMPOSED IMPLIED WARRANTY IS LIMITED TO ONE (1) YEAR. THIS WARRANTY DOES NOT COVER, AND CHEFMAN® SHALL NOT BE LIABLE FOR, INCIDENTAL, INDIRECT, SPECIAL, OR CONSEQUENTIAL DAMAGES, INCLUDING WITHOUT LIMITATION,
DAMAGE TO, OR LOSS OF USE OF THE PRODUCT, OR LOST SALES OR PROFITS, OR DELAY OR FAILURE TO PERFORM THIS WARRANTY OBLIGATION. THE REMEDIES PROVIDED HEREIN ARE THE EXCLUSIVE REMEDIES UNDER THIS WARRANTY, WHETHER BASED ON CONTRACT, TORT OR OTHERWISE.
This Warranty gives you specific legal rights, and you may also have other rights that vary from state to state or province to province. Some states or Provinces do not allow the exclusions or limitations
outlined in this Warranty, so the above limitations or exclusions may not apply to you depending on the jurisdiction of purchase. Chefman® is a registered trademark of RJ BRANDS, LLC. Cooking Forward™ is a trademark of RJ BRANDS, LLC.
Intertek® is a registered trademark of Intertek Group, PLC.
For More Manuals by Chefman, Visit Latest Manuals
FAQs About Chefman Anti-Overflow Belgian Waffle Maker
How long does the Chefman waffle maker take to cook waffles?
Be cautious not to overload the waffle maker to the brim as you pour roughly 6 ounces of batter into each quadrant. The batter will seep out the sides as a result. Cook for 3 to 5 minutes, or until golden brown and crispy.
What is the duration needed to use a Belgian waffle maker?
For four or five minutes, cook at 375 °F (190°C) if you have a domestic waffle maker. Refrain from opening the lid before the allotted time has passed! Depending on the size of your waffle maker, this amount of batter will generate around six large Belgian waffles.
How long does it take to cook waffles?
As directed by the manufacturer, preheat a waffle maker, lightly coat the surface with a small amount of oil, and then pour in enough batter to barely cover it. Cook the waffles for the recommended amount of time (typically 5 to 6 minutes) or until they are crisp and golden brown.
Is Teflon used by Chefman?
Teflon that doesn’t stick. A: Not at all. It doesn’t.
From where is Chefman?
The US headquarters of Chefman are located in Mahwah, New Jersey.
What kind of material works best for waffle makers?
Professional waffle makers choose to use cast iron because of its great thermal conductivity, remarkable durability, and capacity to keep a constant temperature. Selecting a waffle iron made of cast iron guarantees uniform frying and unmatched longevity.
In a waffle machine, how much batter is there?
The hitter: For uniformly shaped waffles, make sure you pour the batter into the lower grid’s center and spread it out with a heatproof spatula. Use 3/4 cup batter or enough to cover the entire lower grid, for the greatest results.
Is a waffle maker oiled?
Cooking oil should only be lightly coated on nonstick waffle makers before their first use of the day, not before each waffle is prepared. It’s preferable to apply cooking oil with a pastry brush or a reusable spray bottle like a Misto.
What thickness is ideal for a Belgian waffle?
As of late, “Belgian waffles,” as the term has come to be known, are at least twice as thick as typical waffles (7/8″ or 2.2 cm), and some are up to FOUR times thicker (1½” or 3.8 cm).
Why do waffle makers in Belgium turn over?
Their operational procedure is as follows: The batter spreads and cooks on the bottom plates of the waffle maker as soon as you pour it in. For the batter to pour onto the top plates, you must then turn the machine over and enable direct contact. By doing this, the waffle will cook more quickly and brown on both sides equally.


